Today I have an Illustrator tutorial for you! With a cuddly dinosaur! Roarrrr!
I hope that this tutorial will help your Adobe Illustrator skills, and help you relax, have some fun, and subscribe to keep the good times rolling in the future 🙂 .
Please feel free to leave comments, ask questions, and just really engage and get involved with these tutorials. We want to help you succeed, and we also want to sharpen our own skills and take your comments into consideration for future tutorials.
Please note that not everyone’s dino will look exactly the same, its about learning the techniques and methods – So just have fun and create your own!
Having said all that, lets jump right in shall we?
Final Image
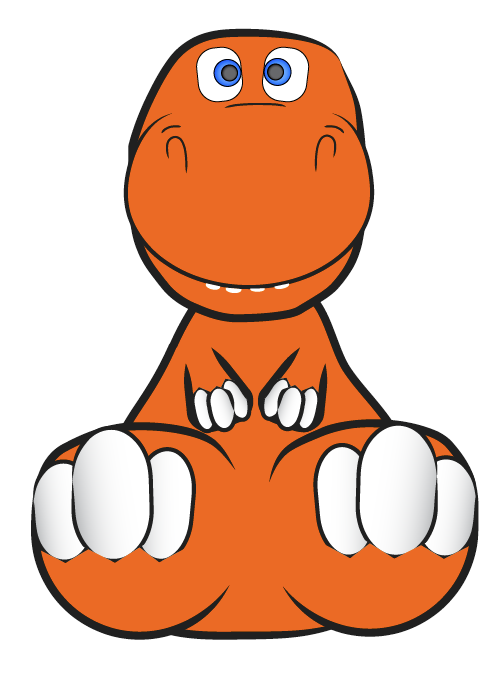
Now that is what I call a Man’s Dino. See the testosterone radiating from it? No? Really? Okay.
Ready to make your own? Keep on Readin’!
What you need
For this tutorial, you just need Adobe Illustrator (I am using CS4), and your skillz. (a mac would help, LOL jk)
Step 1 – Getting Started

Ok, Fire up Illustrator and Start a new fresh document (File > “New” or Command+N) and hit OK. The default size (1200px by 900px) is what I typically use unless I know I need something huge, or am working in Print, but I am almost always doing web stuff, so this is fine for now. Just imagine you are a painter, and this is your canvas, and that is the point of Illustrator 🙂 .
Usually Illustrations almost always start with a sketch of what you want to draw out in Illustrator, then you scan the sketch you did, and import it into Illustrator to trace. Well that isn’t how we are going to do it today, mainly because I suck at drawing (but drawing on the computer is easy for me? Strange I know), so I will spare you from that 🙂 . I like to play around with what works in Illustrator, and sometimes I take it in a completely different direction than what I thought I was doing when I started, it is all part of the creative process.
Lets start drawing the head of our little Dino!
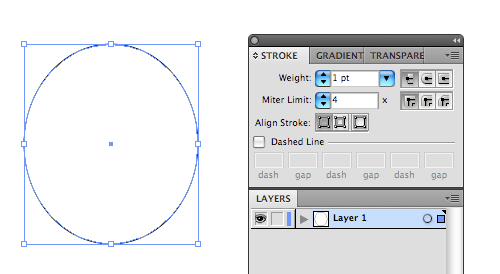
First, just grab the ellipse tool (Press the “L” key to select) and draw a circle like in the above image. By default this will have a white fill and black stroke, which is fine for now.
Again, if it doesn’t look exactly like what you have, no worries, just make it as close as you want 🙂 .
Now that we have the Circle, we need to add some points to it that we can manipulate to make the dino’s head shape more natural.
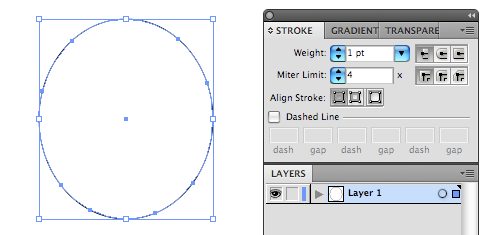
To do this just grab the Direct Selection Tool (Press the “A” Key to select) and click on the circle. Then grab the Add Anchor Point Tool (by pressing the “+” key) and add some points like I did in the image above.
Step 2 – Manipulating Shapes & Building out the Character
Ok, So now we have the Shape for the head, the Points added (I added 8 new points, you may have added more/less) so now we are ready to manipulate those shapes and make it look more like a Dino head!

To do this, we again grab the Direct Selection Tool (Press the “A” Key to select) and click on the head shape again, then we click on the individual anchor points and you will see little “Handles”. What we are going to do, is click on these handles and drag them to manipulate the shape of the circle. Drag the handles around until you get a shape similar to the one above. It is tricky to get it right the first time if you have never done it before, but you get used to the handles, they are your friend 🙂 .
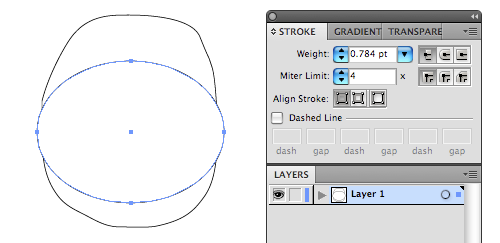
Ok great, so now we are going to again use the ellipse tool (Press the “L” key to select) and draw another circle on top of the one we had done before, similar to the image above. This is going to be his Nose/Mouth.
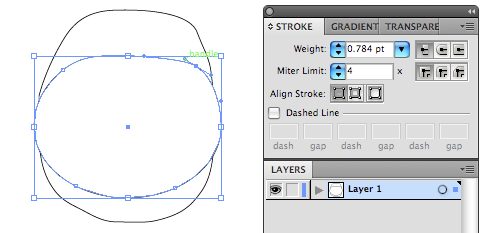
We are going to add some more points like we did before. Grab the Direct Selection Tool (Press the “A” Key to select) and click on the new circle. Then grab the Add Anchor Point Tool (by pressing the “+” key) and add some points and drag out the handles a little to shape them similar to how I did above.
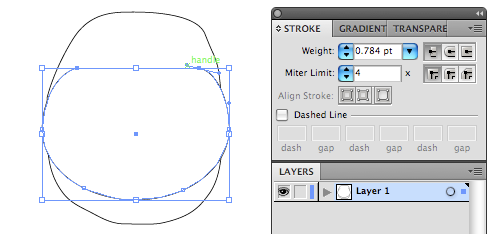
Now we are going to use the Direct Selection Tool (Press the “A” Key to select) to select the top center anchor point in our newest circle, and press the ‘delete’ key to get rid of it. Then use the Direct Selection tool again to click on the top anchor points that are left, and drag them both up a little bit, and round out the edges a little more like above.
Now you should have the basic knowledge of Illustrator to build basic shapes and manipulate them. So I am going to build out the rest of the Dino using those techniques since I will be using the same methods to achieve the shapes, then in the next step I will show you how to connect these pieces!

The above image is where we are going to start in step 3. Starting to look like something eh??
Lets keep going!
Step 3 – Minor Details
Ok, so the basic outline is there, lets group some things together and add some character and color!
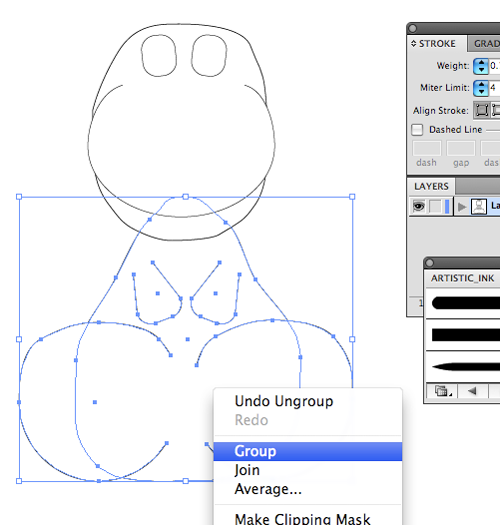
First lets group up the body, arms, and legs/feet. Simply use the Selection Tool (Press the “V” key to select) to click, drag, and highlight all the appendages. Then Right Click on the selection, and click ‘Group’. If you are confused refer to the image above.
Now we can add some Color!
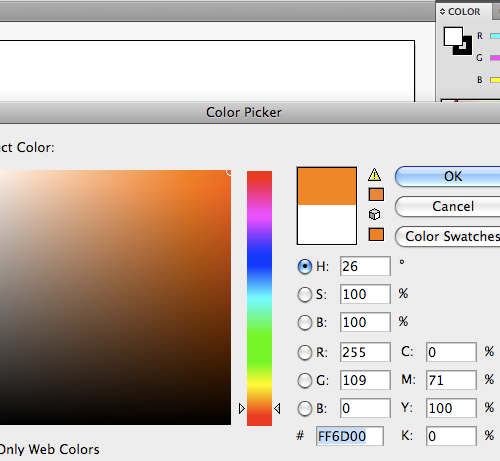
With the grouped selection highlighted, lets click on the “Fill” color (which should be white at this point) and lets change it to Orange (#FF6D00) because I like Orange Dinosaurs. Your Dino can be a different color if you want. Refer to the image above to see what I did there.
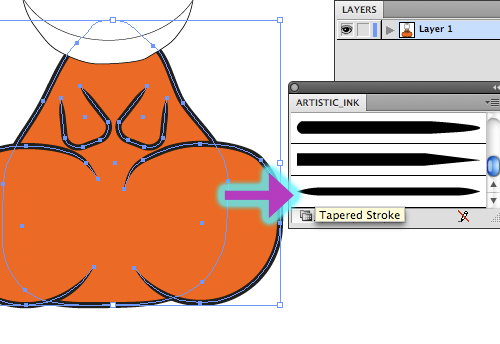
Now lets take care of cleaning up the blocky parts where we deleted anchor points. Open the Artistic-Ink brush library from the Brushes Palette, make sure you have selected the grouped layer we just colored when you choose a nice tapered effect to remove the square edges. I used the ‘Tapered Stroke’ in the Artistic_INK pack as seen above.
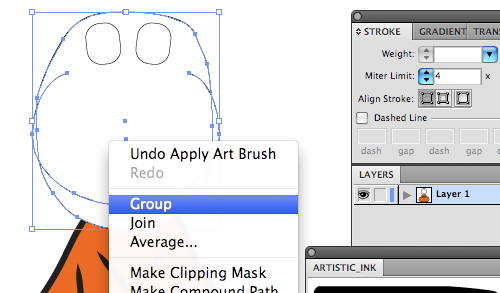
Now do the same thing we just did for the body, for the head, as seen above. However, make sure you SHIFT Click the eyes, so they aren’t grouped. It looks creepy enough with White eyes, we don’t need orange eyes! 🙂
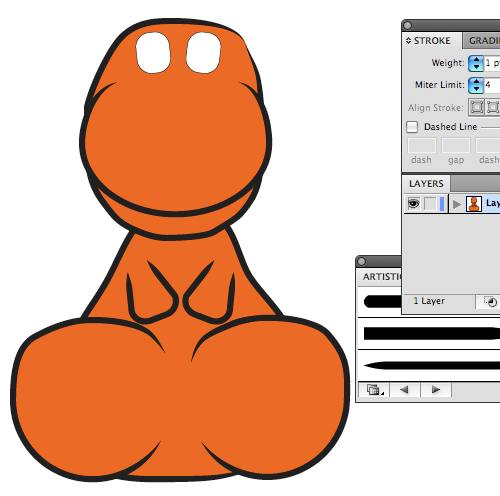
You should now have something like the above image, maybe not the same color, depending on your mood 🙂
Now lets move on to the final details!
Step 4 – Even Minor(er?) Details!
Ok, It looks like a Dino now!
With Creepy Eyes.
Lets fix that first so it will stop stealing your soul.

First, you want to create the Iris using the ellipse tool (Press the “L” key to select). Hold down the SHIFT key while making the circle, and it will make a perfect circle (Good band lol). Once you have the circle in place, then use the Gradient panel (Window > “Gradient” if you don’t already have easy access to it) to create a blue going up to a darker blue and set it to ‘Radial’. You can pick whatever color you would like however.
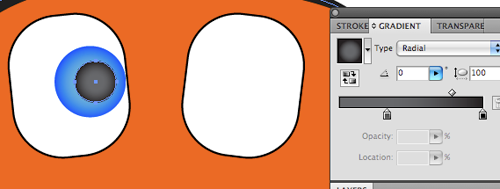
Then just Copy (CMD+C) and paste (CMD+F) the Pupil circle, scale down while holding Shift, then swap the gradient out for a couple of darker greys to form a pupil.
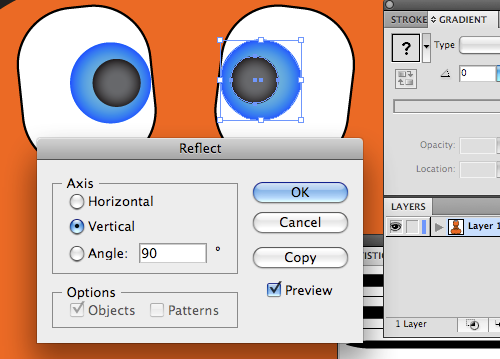
Then select the Pupil, and the Iris circles, copy (CMD+C) and paste (CMD+F) them, move them over to the other eye, and then go to (Object > Transform > “Reflect”) select “Vertical” and 90 Degrees. Then you will get a mirror image of the pupil/iris you just created! It should look like the above image.
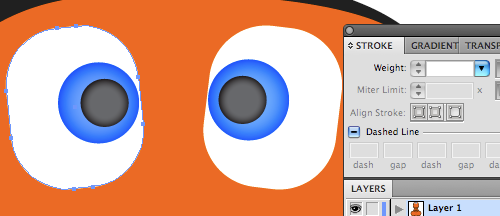
Then we just want to click on the white part of each eye with the Selection Tool (V), and just remove the “Stroke” like we did in the above image from the stroke menu.
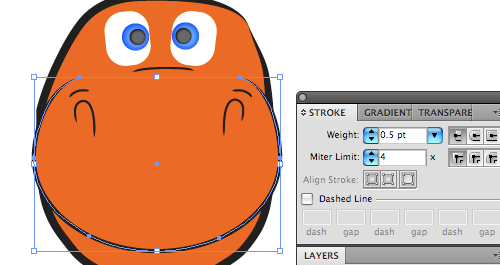
While we are at it, lets select the upper mouth part and lower the stroke just a tad like in the above image.
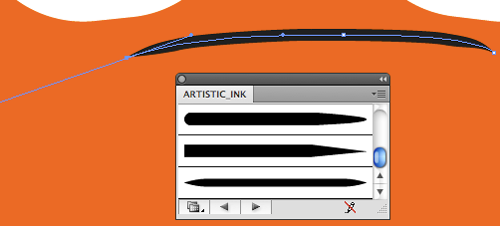
Now that we have the eyes in there, Lets add a bridge to his nose, so his face looks a little less flat 🙂 . To do this, like in the above image, simply select the Pen Tool (P) and click once, hold it down, and kind of move the mouse in the curve that you want, sort of like drawing an imaginary line. then once you release, the point is there at the beginning, then click for the 2nd point where you want the line to end. Illustrator will then draw out the curve for you (almost, typically needs some tweaking to get it exactly how you want it, but this is a good way to speed things up).
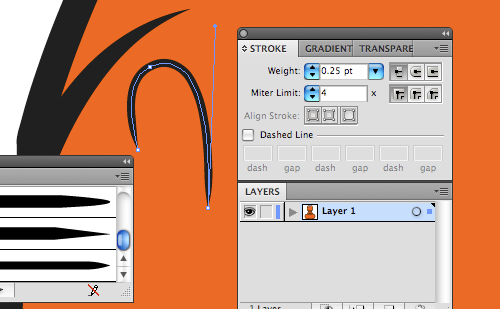
Then, we add a nostril, using the same technique as above! Pen Tool (P) Click, hold and drag. Draw out the imaginary curve. Release mouse button, then click again for the line end point.
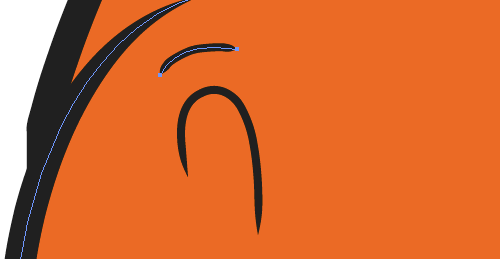
Then same technique again for the top of the nostril! Repeat that for the other side.
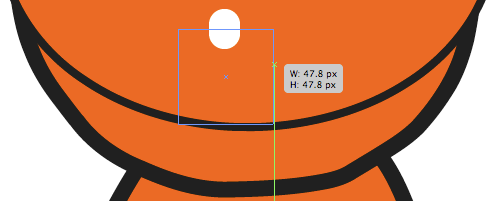
Now we need some teeth! To start off with the teeth, we are going to create a rounded rectangle using the Rounded Rectangle Tool. Just make a small, rounded rectangle with a white fill. as seen above. THEN we are going to create a rectangle over top of the bottom half of the ‘tooth’ for clipping purposes only.
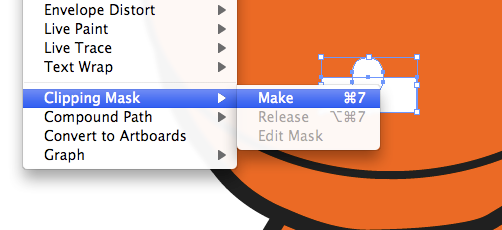
OK, now select both the ‘tooth’ and the rectangle at the same time, but SHIFT Clicking on them one at a time. Go to File > Object > Clipping Mask (Or Command+7) and VOILA!
You get a nice little half rounded corner thing that looks like a tooth!
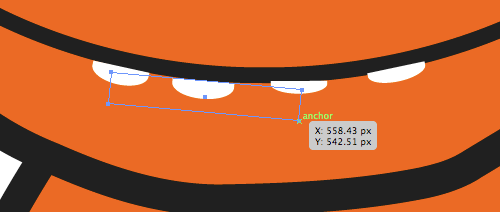
Now, take your newly created tooth, duplicate it 4 times, and start sizing them down (squishing them almost) to a nice little size and align them along the bottom part of the upper mouth. Like in the above image.
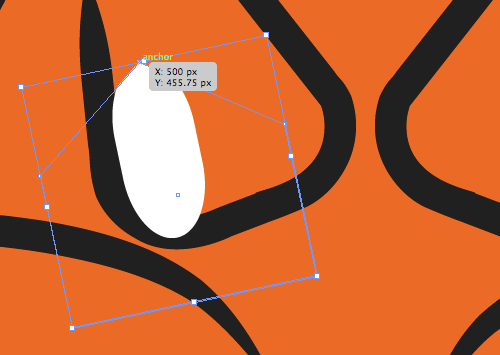
Now lets add ferocious claws!!! I took one of the teeth CMD+C & CMD+V’ed it and just resized it for the claw above, Illustrator rocks the vector like that, so its all good 🙂 .
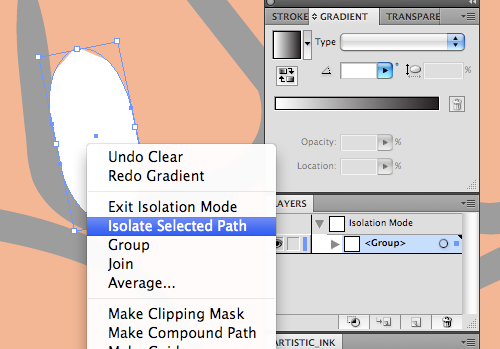
But I want to put a light gradient on my claws so they shine just a little. To do this, just right click and select ‘Isolate Selected Path’ and you get a nifty little lightbox effect on the shape.
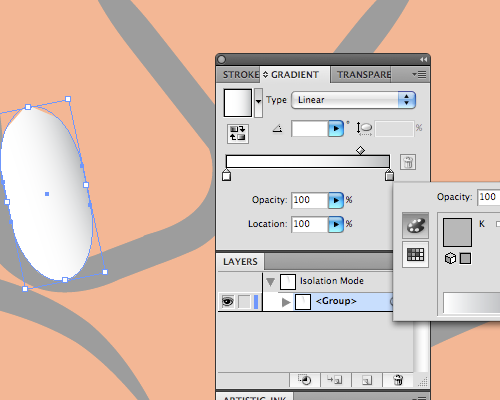
Then all you have to do is select the gradient you want to use, im going with an extra light grey to white.
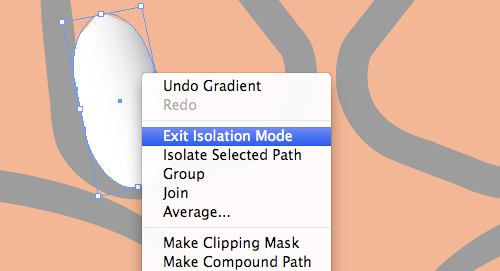
Once satisfied, just right click and ‘Exit Isolation Mode’
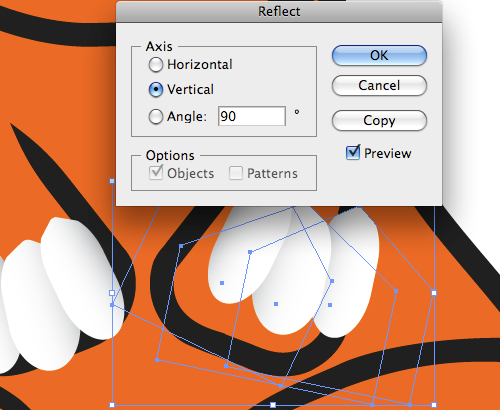
Now just CMD+C then CMD+V for the other two claws on the hand, I slightly resize them and spread them a tad. Once you light the way hand #1 feels, lets just SHIFT Click the three claws, and CMD+C and CMD+V them, then just go to (Object > Transform > “Reflect”) select “Vertical” and 90 Degrees. Then you will get a mirror image that you can move over to the other hand!
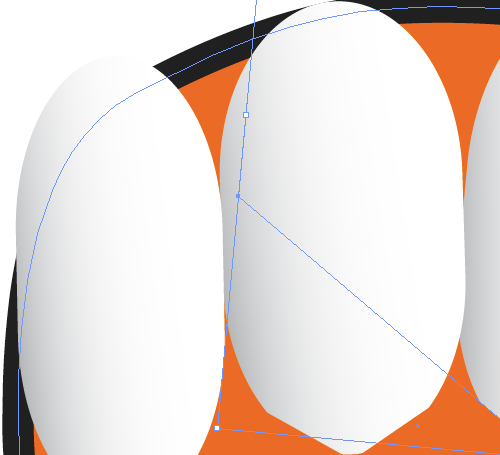
For the foot claws (what? lol) I copied over the claws from the hands, spun them around, made them bigger and spaced them out some more.
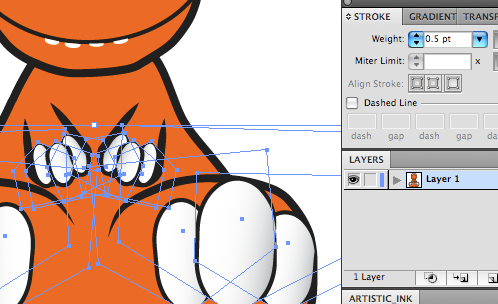
Then I went ahead and added a stroke to them all, by SHIFT Clicking each claw, then applying a 0.5 stroke to them.
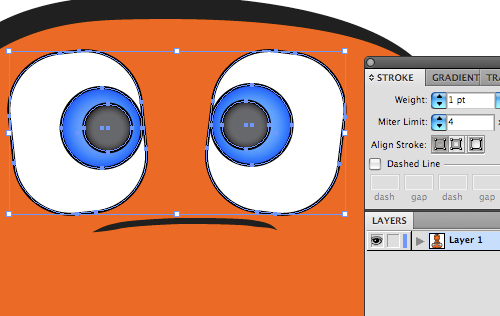
Then for the final touch! I selected all of the eye parts, and added a 1pt stroke to them. DONE.
Final Image

Well there you have it. You should have something similar to this image for your dino!
Everyones will be different slightly or by a lot, depending on what you want to do 🙂
I hope that everyone enjoyed this tutorial and learned a lot of things about Drawing in Illustrator!
If you guys attempt to create your own dino I would love to see it! So leave your attempts in the comments!
If you have any questions or comments feel free to leave them as well!
You like this? Don’t forget to follow us on twitter @andysowards and like us on facebook @andysowardsfan! We are also on that Google Plus & Pinterest thing.

