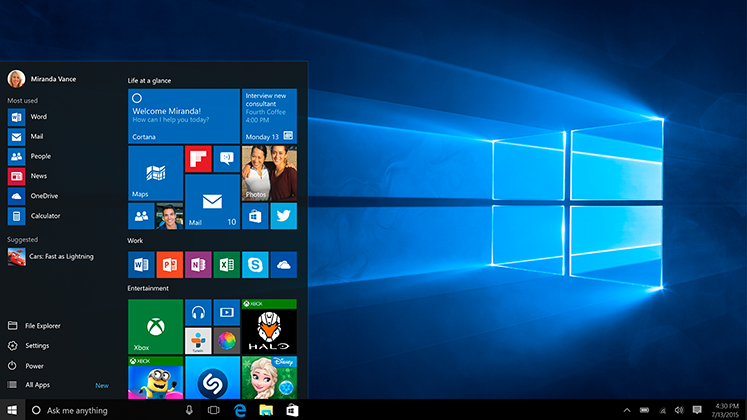
Microsoft is a persistently growing and one of the leading operating system manufactures in the world. The Windows 10 comes and it started rolling out on Wednesday. All of us know that it may be hard to resist. And many Windows fans couldn’t wait to update their OS into the latest version then.
Similarly, every time when Microsoft upgrades its OS, a new discussion whatever its new features or bugs will be aroused. For Windows 10, you still can’t ignore the fact that, similar to other Windows operating system even this OS is not free from data loss.
What Causes Date Loss in Windows 10?
Before upgrade the latest version OS, you forget to backup your important documents and other files.
- To resize, create or delete Windows partition by third-party application.
- Saving or adding important files and folders on Windows 10 hard disk containing bad sectors
- Careless operation or improper deletion can all make your data lost
- Errors while defragmenting your Windows 10 hard disk, like sometimes users defrag their hard disk to access data in a faster way. But if the process is carried improperly then it results in deletion or loss of files
Free Windows 10 Data Recovery Software
Tenorshare Free Any Data Recovery is free Windows 10 data recovery software that can recover deleted, formatted photos, videos and documents and so on. With it, you can restore partition table and recover lost files from corrupted, resized, deleted or dead partitions. Before you get data back, you are supposed to install this software on a partition that is different from the one where your lost data located. Then launch it and connect your portable to computer in advance.
Step 1. In this page, you can see the files such as Graphics, Audio, Document, Video, Email or other. Select file types you lost and click “Next”.

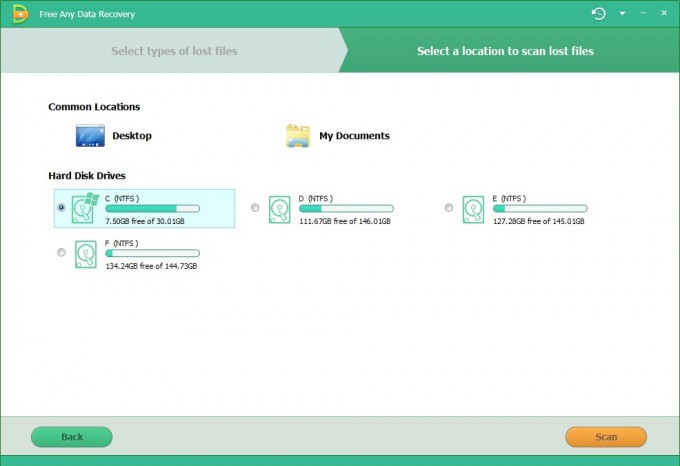
Step 2. Select a location where you want to save lost files like Desktop, My Documents or external device. Then click “Scan”.
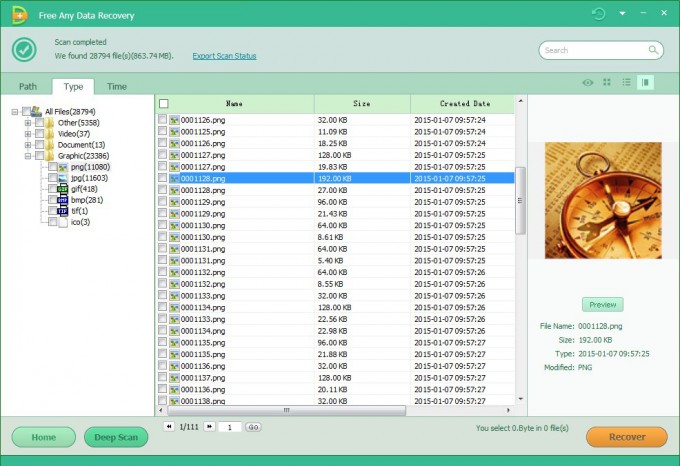
Step 3. After finish scanning, all the recoverable are listed by path, types or time. Select the files you want to recover. Before recovery you’re allowed to preview files to make sure whether you need. Click “Recover” to start recovery
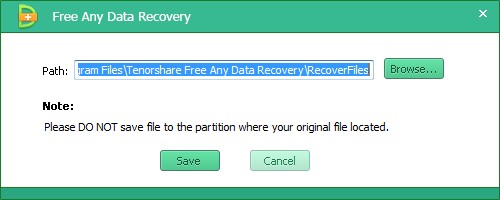
Step 4. Choose a path on your computer to save the recovered files. Click “OK” to complete recovery. Do not save the data to the partition where your lost data located.
If you have any question, please leave your comments in the comment section.