
Ensuring the quality of your test prints directly influences the success of your final output, reducing errors and operational costs while maintaining customer satisfaction. A meticulous quality control process can help printing professionals avoid costly mistakes, such as color inaccuracies, misalignments, or poor resolution.
By implementing a structured checklist, you can standardize your printing process and achieve consistent, high-quality results. Take a look at this quality control checklist for test printing to build a strong step-by-step process for your operations.
Pre-Flight Check and File Preparation
Starting any printing job without a comprehensive pre-flight check can lead to significant issues later in the process. A pre-flight check serves as the foundation of quality control, ensuring your files are ready for production. Carefully verify file formats, embedded fonts, and linked images to ensure the printer will properly support everything.
Additionally, make sure your resolution is set to at least 300 dpi, as images with a lower resolution can result in blurry or pixelated prints. Confirm that the bleed is adequately accounted for to avoid unintended white margins post-trimming. Lastly, double-check your color mode. For print, ensure the file uses CMYK, not RGB, as this will more accurately reflect how the colors appear on paper.
Evaluate Color Accuracy With a Spectrophotometer
One of the most critical steps is verifying color accuracy. Even minor deviations in color can alter the print’s overall look and feel. Using a spectrophotometer allows you to measure color density and ensure it aligns with your target values or client specifications. This tool is particularly essential when working with brand-specific colors or attempting to match complex gradients.
Sometimes, large prints are more susceptible to color shifts along the edges of the image. Be sure to address color shift on large prints by conducting multiple color checks across different sections of the print. Consistent results are important to achieve professional-grade output.
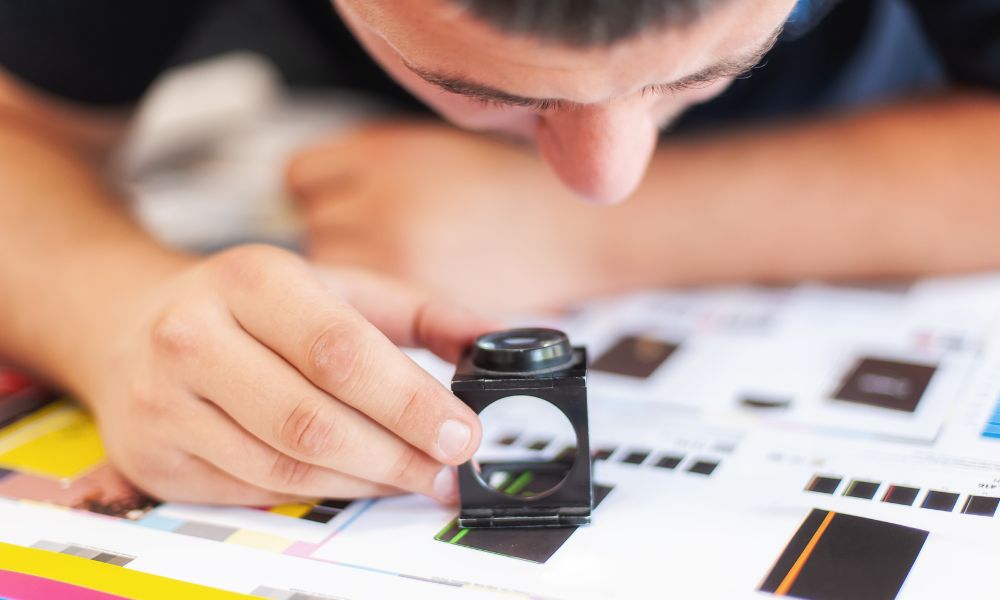
Ensure Registration and Alignment Precision
Registration and alignment are vital for printed pieces that incorporate multiple layers of color or require exact placement of text and graphics. Misaligned layers can result in visible color overlap or ghosting, which reduces the overall quality of the print.
Inspect horizontal and vertical registration marks on the test print to verify alignment precision. A loupe or magnifier is particularly helpful in ensuring precision at the micro-level, especially for small or intricate designs. For printers running high-speed jobs, pause periodically to conduct spot checks and make necessary adjustments to maintain alignment.
Assess Print Resolution and Sharpness
Print resolution and image sharpness are nonnegotiable aspects of professional printing. Poor sharpness will give your print a sloppy and unprofessional appearance, instantly eroding its value.
To evaluate print sharpness, closely examine the clarity of fine details in images, logos, and text. Issues like banding or jagged edges are often the result of either incorrect settings or hardware problems, including worn-out printheads. Many printers allow for customizable print quality settings, so make sure to configure these to optimize sharpness before running another test.
Check Ink Coverage Consistency
Ink coverage consistency is another vital point in assessing print quality. Uneven ink distribution leads to patches, streaks, or inconsistent tones, all of which negatively affect the final output. Thoroughly check solid areas of color on the test print for smooth and even application.
Another factor to monitor is ink drying time, as certain substrates or environmental conditions may delay curing, leading to smudges. Adjusting print settings, like ink density, resolves blotchy coverage, but avoid overloading the substrate, as this can lead to ink pooling or cracking. Always aim for a balance that delivers uniform coverage without wasting resources.
Review Finishing and Trimming Accuracy
Once your test print passes the initial assessments, you’ll need to examine how well it holds up during finishing processes like trimming, folding, or binding. Small inaccuracies will render a perfectly printed design unusable, so precise trimming and clean finishing are paramount.
Using a ruler or caliper, measure critical areas to ensure they align with your bleed and trim guidelines. Pay close attention to intricate cuts; even a slight misstep could weaken the design, particularly if working with die-cuts. If your process involves folding or binding, test these features to check for cracking or displacement of vital elements like text and graphics.
Inspect Substrate Quality
No quality control process is complete without evaluating the substrate being used for printing. Differences in paper thickness, texture, or coating influence ink absorption and color vibrancy.
Confirm the substrate matches the specification intended for the project. For example, glossy paper typically produces sharper, more vibrant results than matte. Next, inspect for visible defects like dents, creases, or uneven edges. These flaws can lead to imperfections in the final print, even if the printing process itself is flawless.
Document and Address Issues Immediately
Effective quality control is as much about documentation as it is about observation. Every issue identified during test printing should be recorded, including a description of the problem, probable causes, and actions taken to resolve it.
For example, if you notice recurring streaks in the print, document the affected areas and whether adjustments to printhead alignment or cleaning resolves the issue. Keeping detailed records serves as a valuable reference point for future print jobs and helps maintain consistency across projects.
Conduct a Final Review and Approval
The final review is your last opportunity to ensure you meet all quality benchmarks before full production begins. Take a comprehensive approach by revisiting all earlier steps—from alignment to color accuracy—to confirm nothing has been overlooked.
Print multiple copies of the final test file and review them under varying lighting conditions. This ensures the output looks consistent in environments ranging from natural daylight to indoor fluorescent lighting. Pay special attention to customer-specific requirements, such as unique branding details or unusual dimensions, and cross-check these against the test print.
By implementing this quality control checklist, printing professionals can ensure that every test meets or exceeds standards. Following these structured steps develops a disciplined approach to quality assurance and builds lasting client relationships. Start incorporating this checklist into your test printing process today to achieve consistent, high-quality results every time.